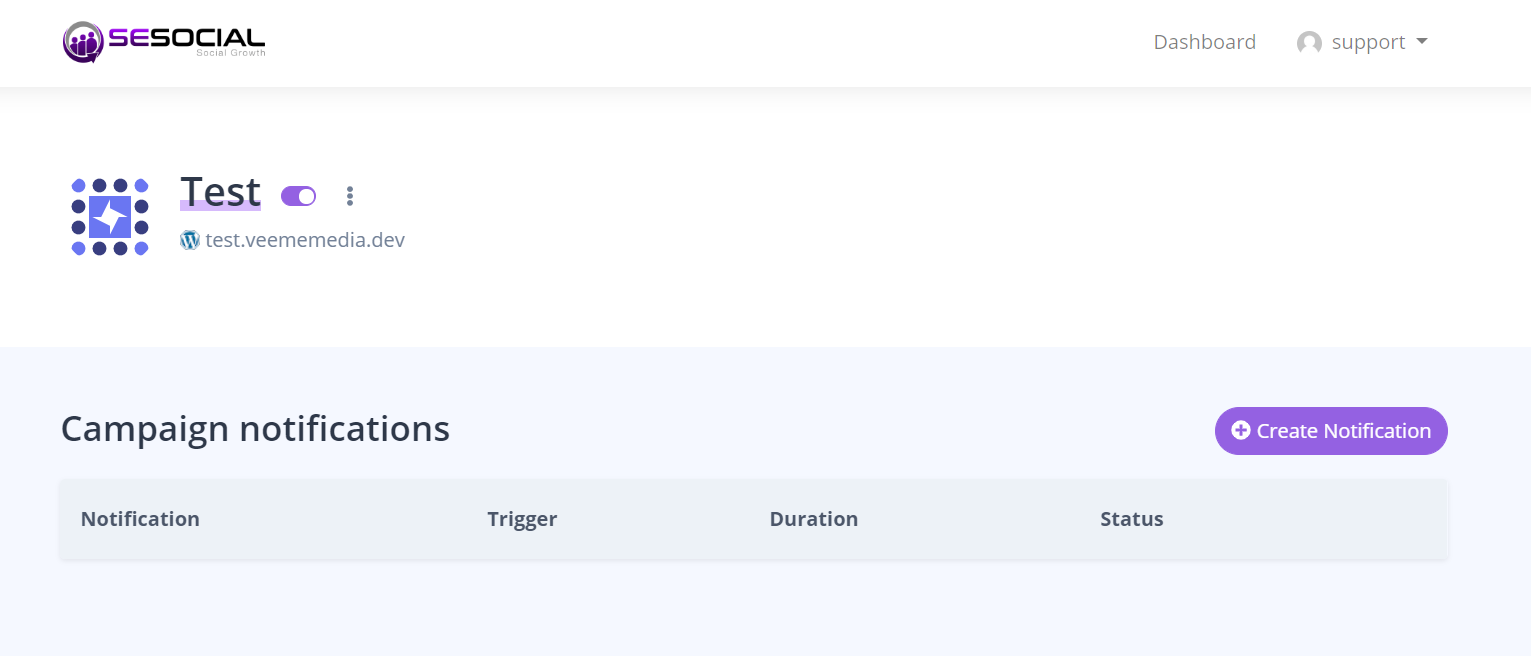
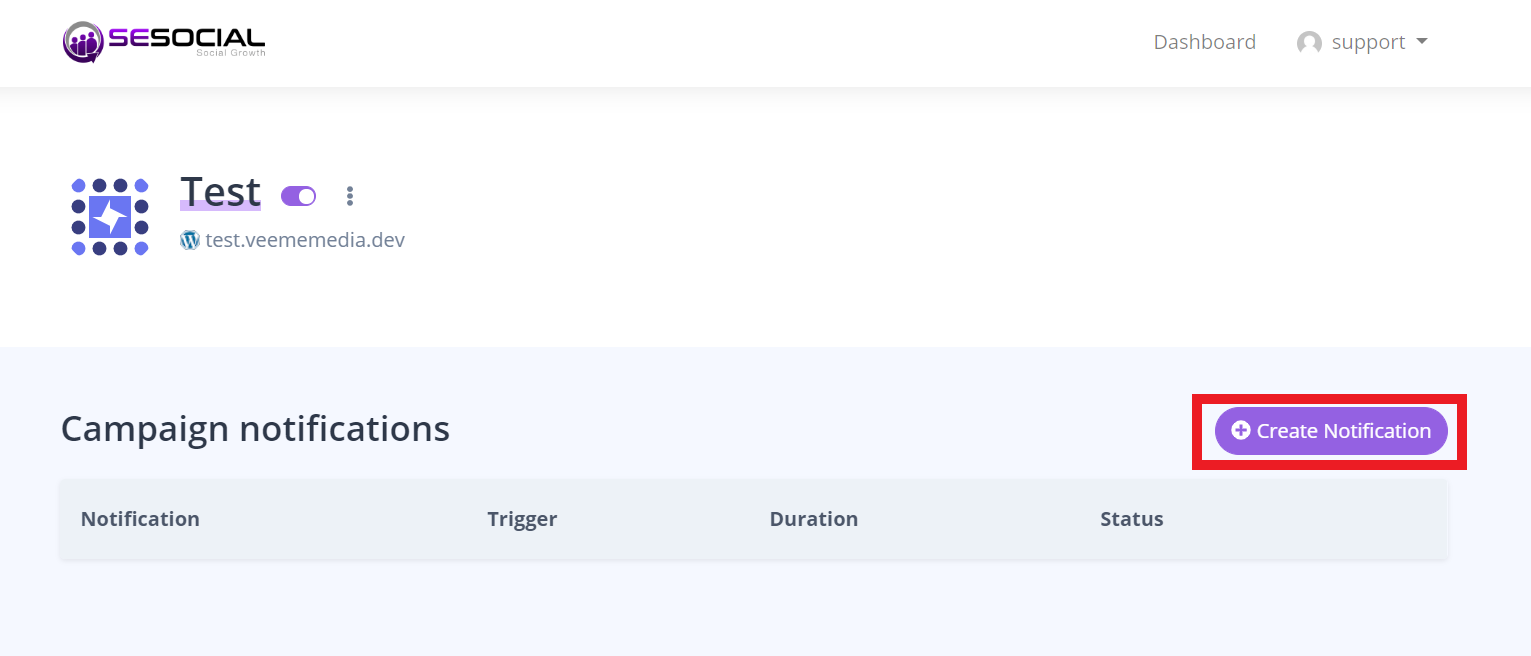
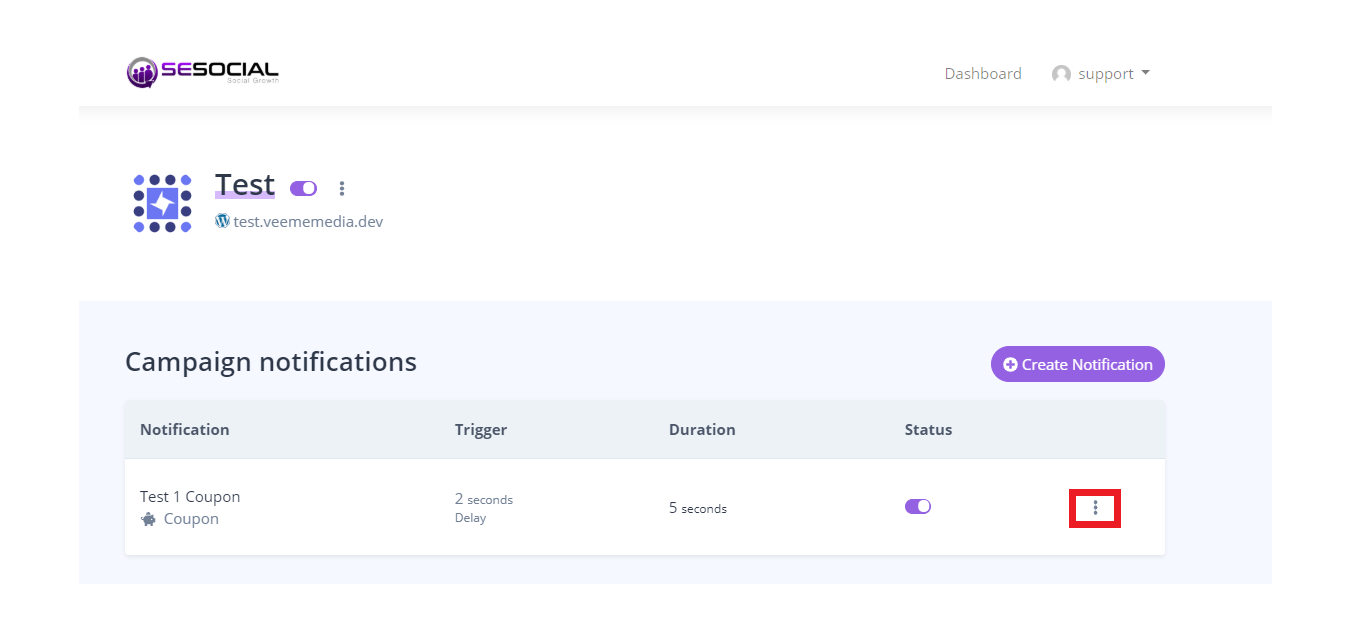
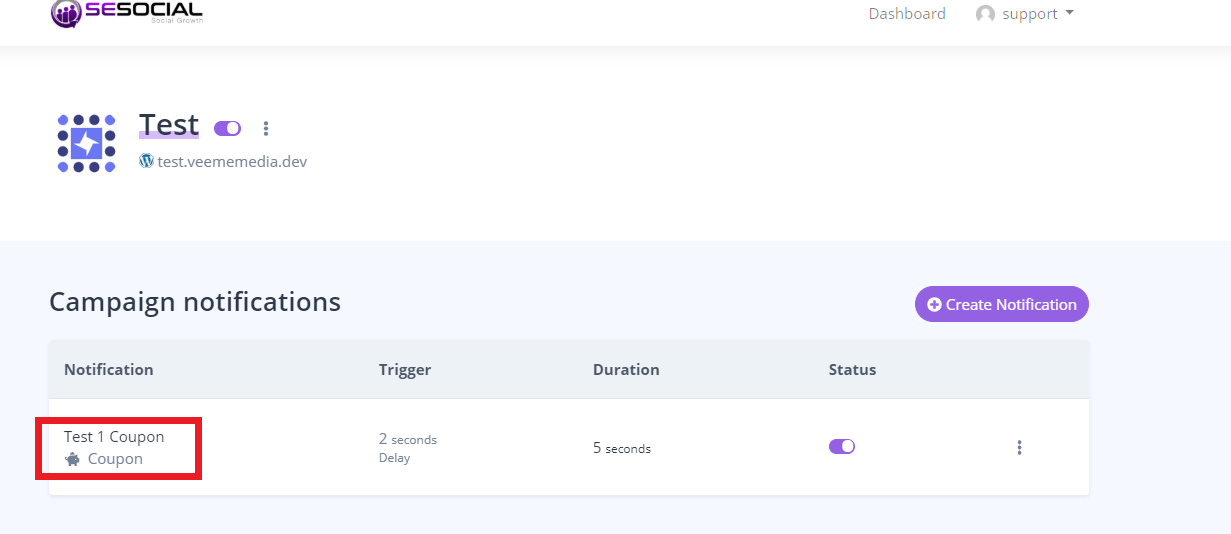
Click "Install script" on your dashboard.
Copy this script.
Then go to your Wordpress account and click "Plugins" and " Add New"
Then Install this Plugin.
After installing the plugin. Click "Settings" and you can see the plugin.
Paste the Script that you copied earlier.
And Click Save in the bottom.
Enter your "Campaign name" and your "Domain and Sub-domain".
and click the "Include subdomains"
After putting your campaign details this is your campaign dashboard.
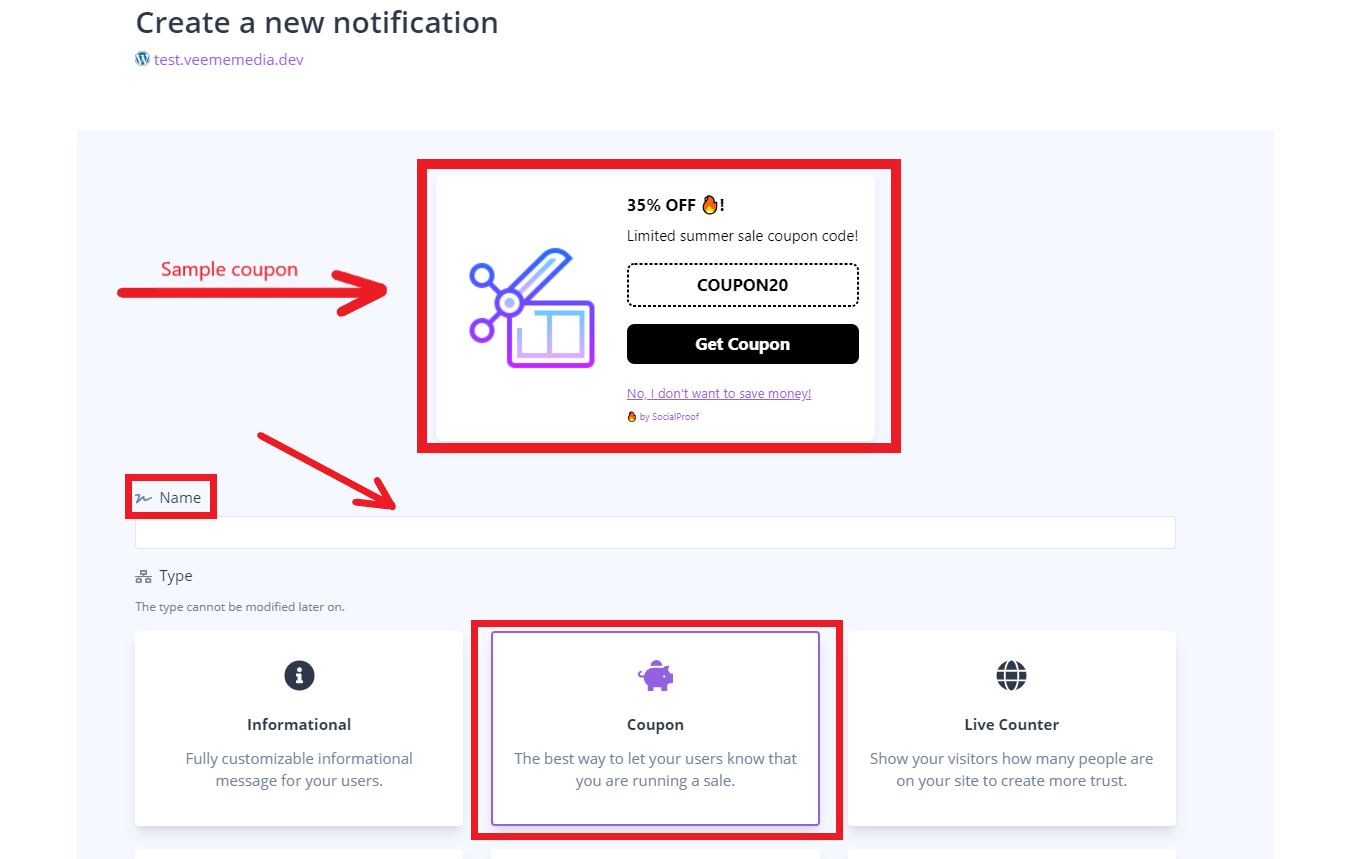
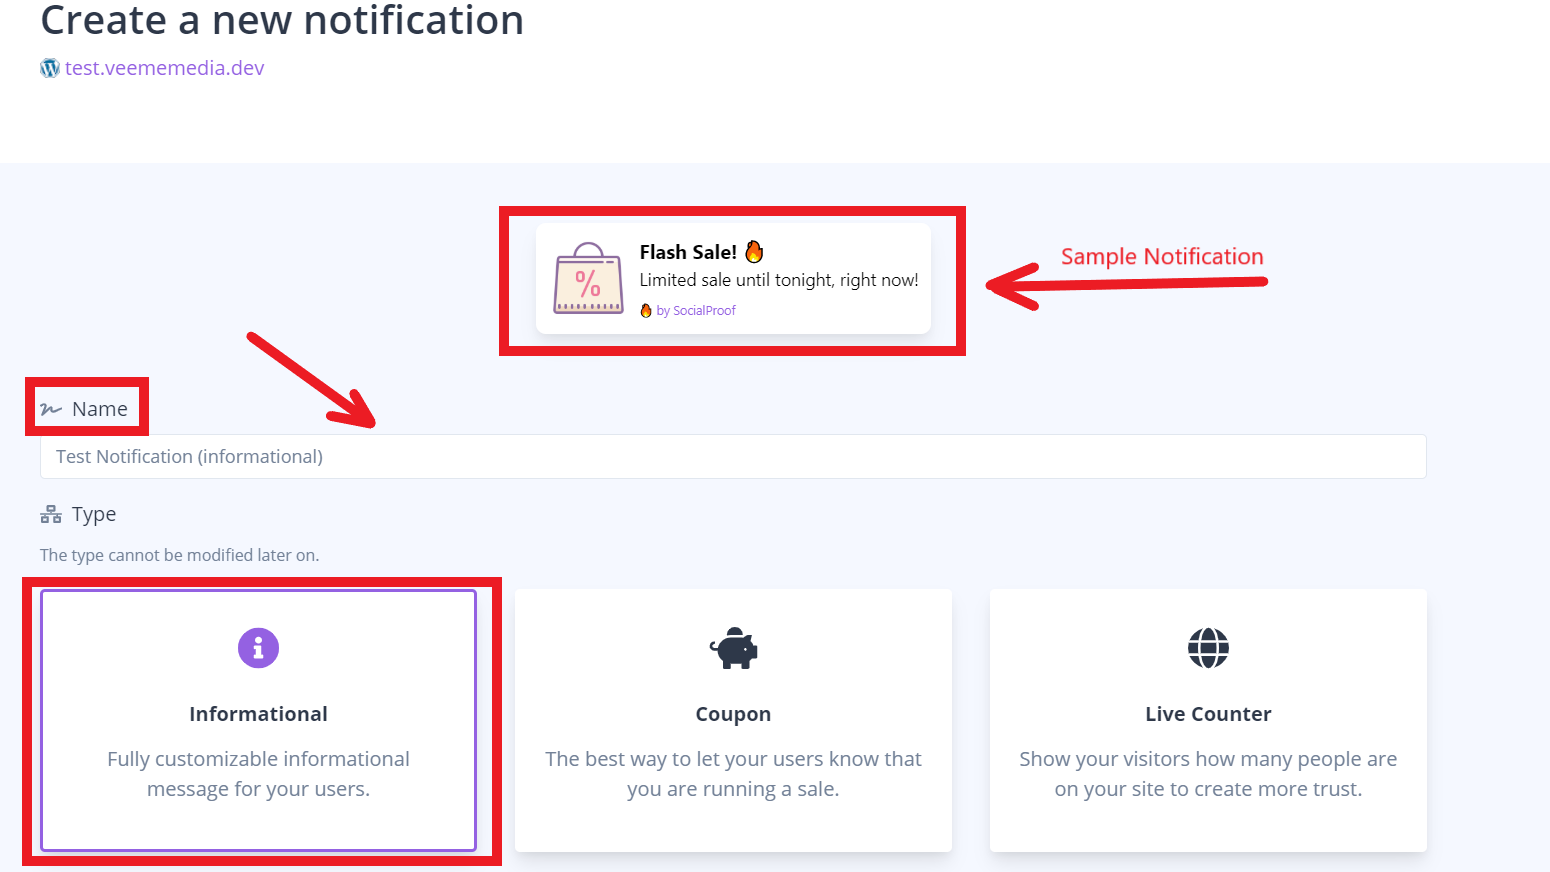
2. we will create the informational notification.
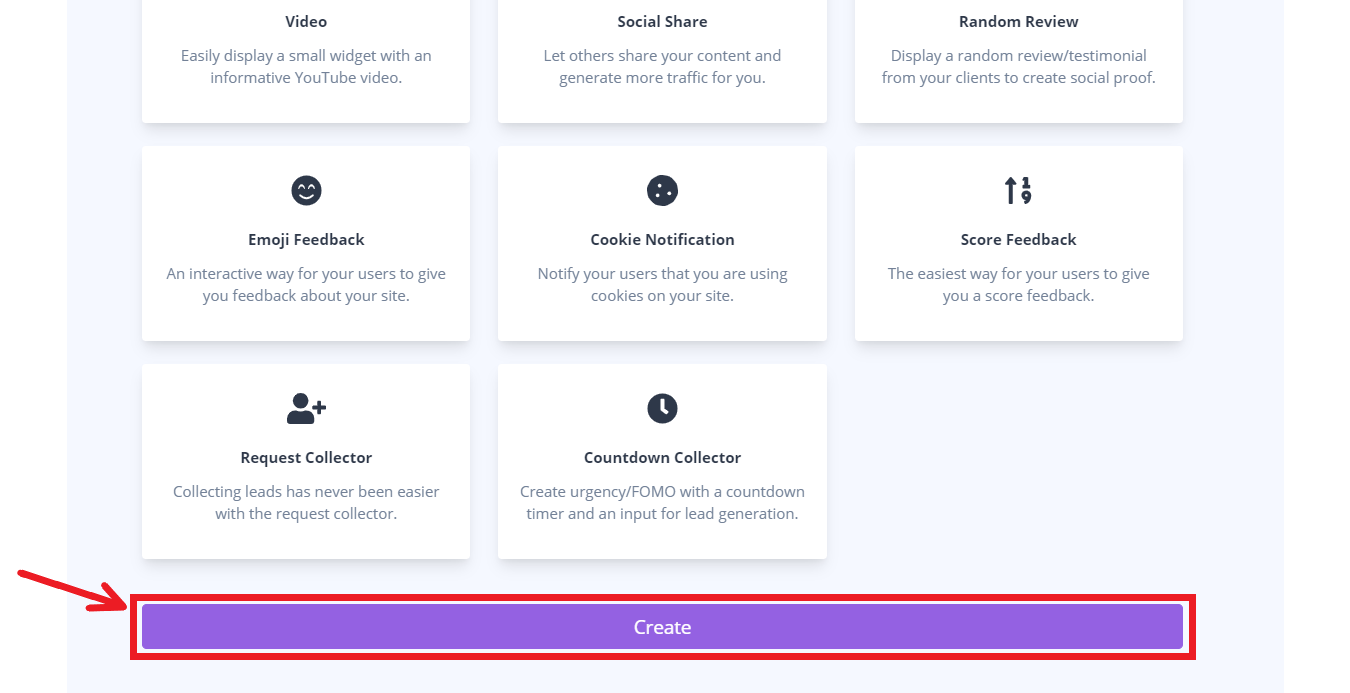
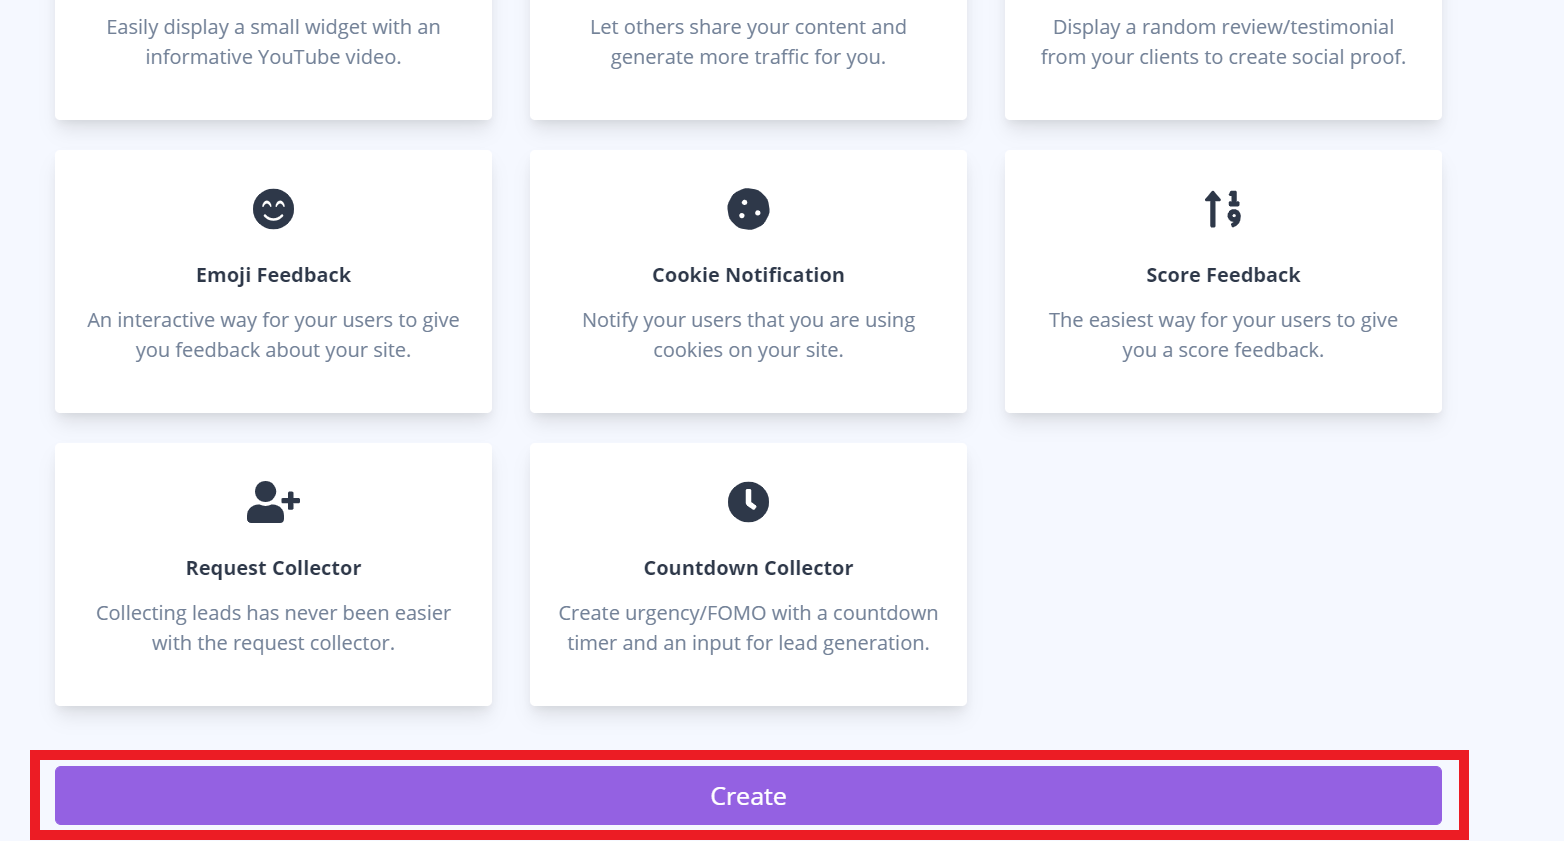
3. click create at the bottom part.
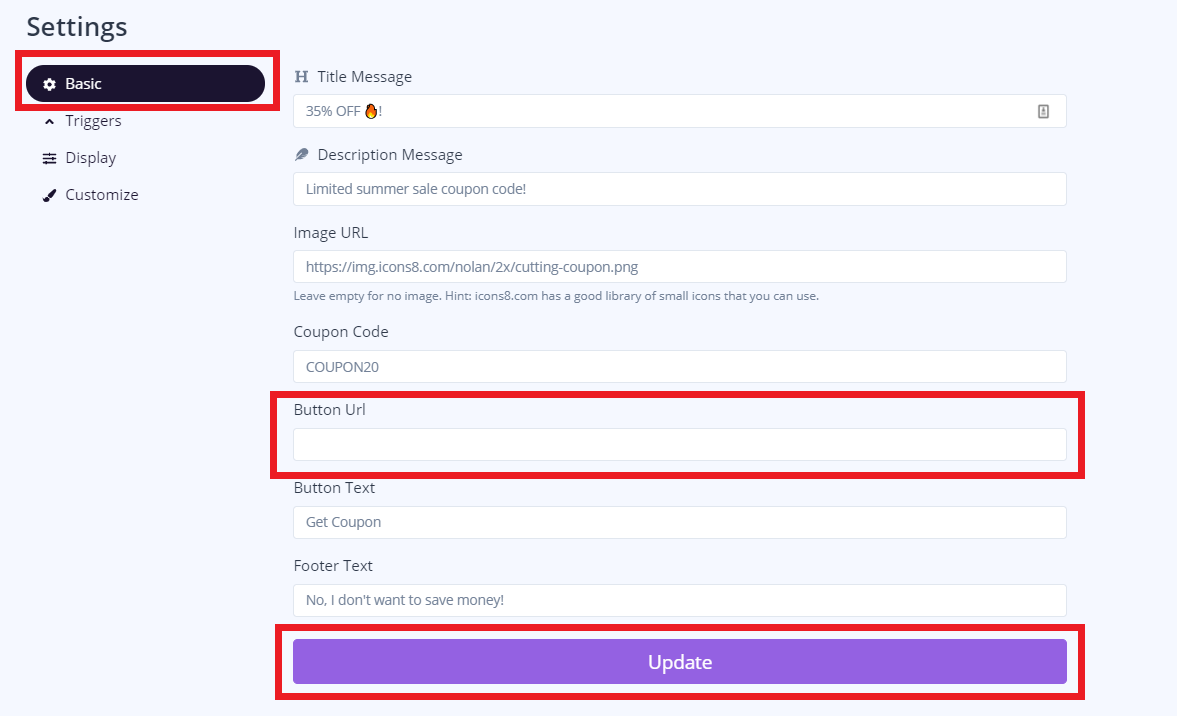
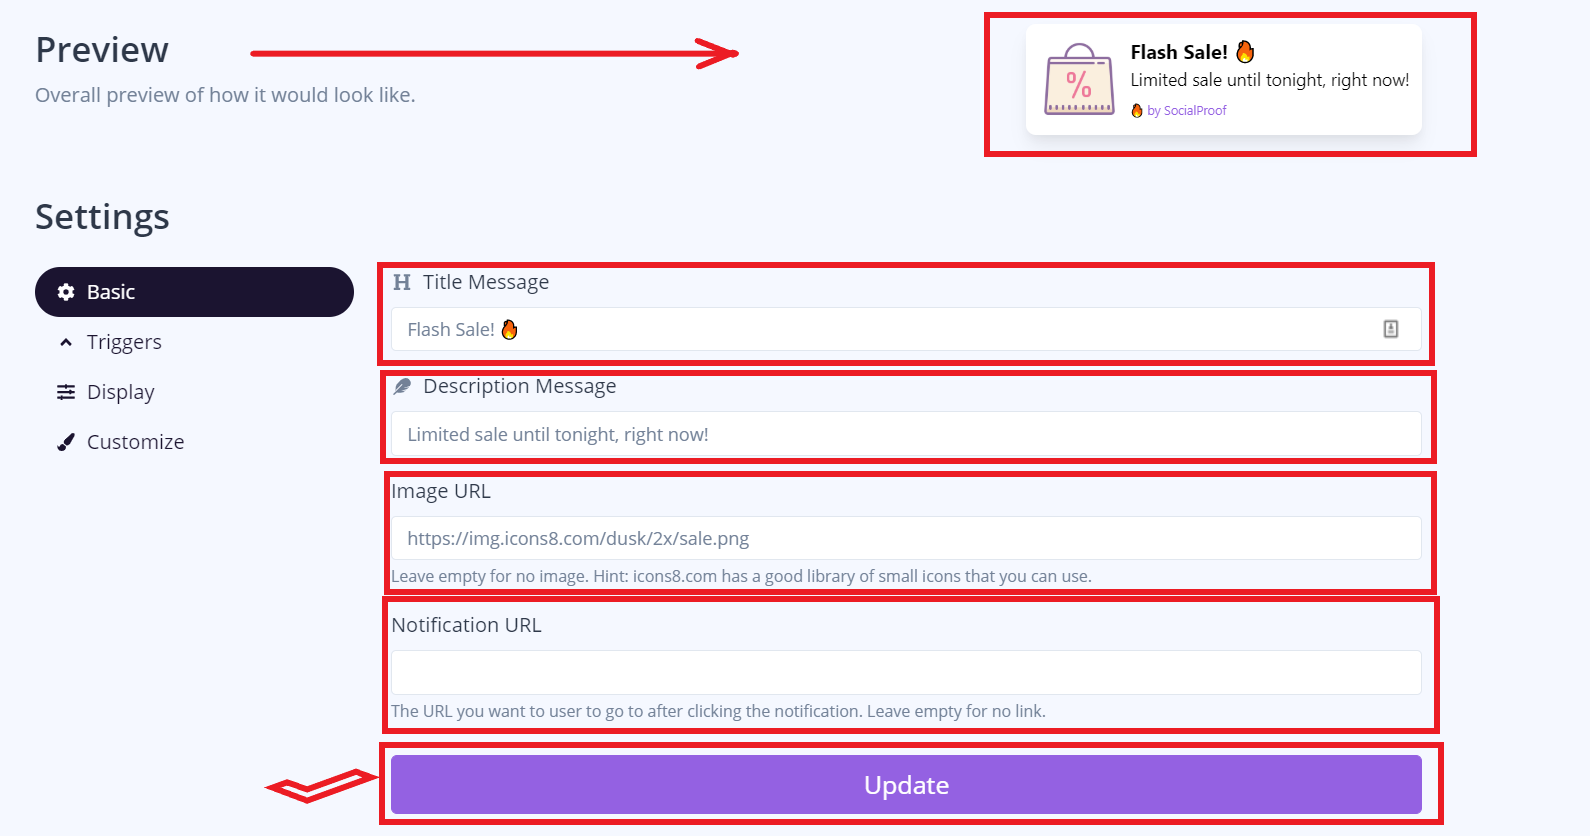
4. This section allows you to change the title message, description message, image URL, and notification URL. Click update once you're done.
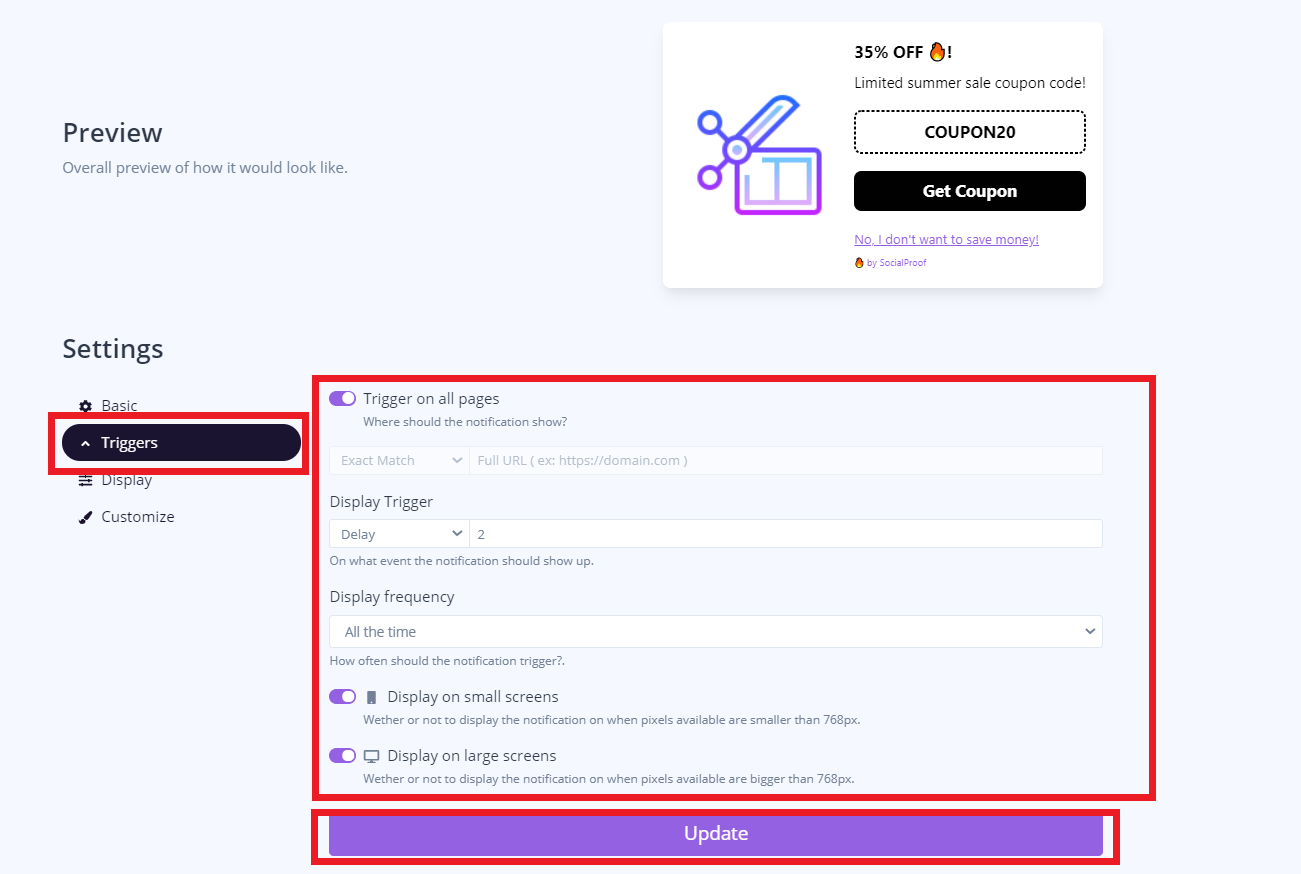
5. This section allows you to what will trigger your notification. Click update once you're done.
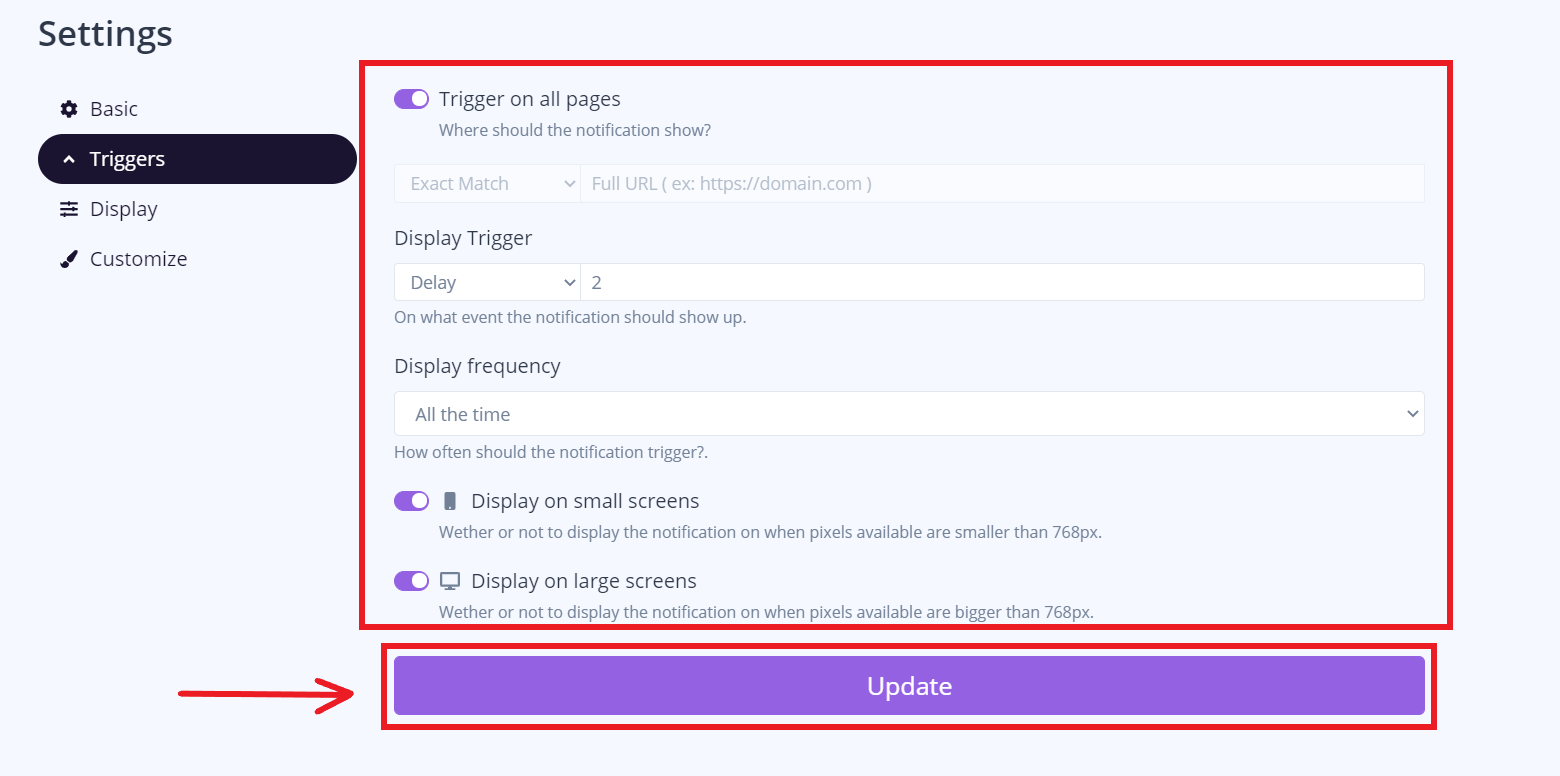
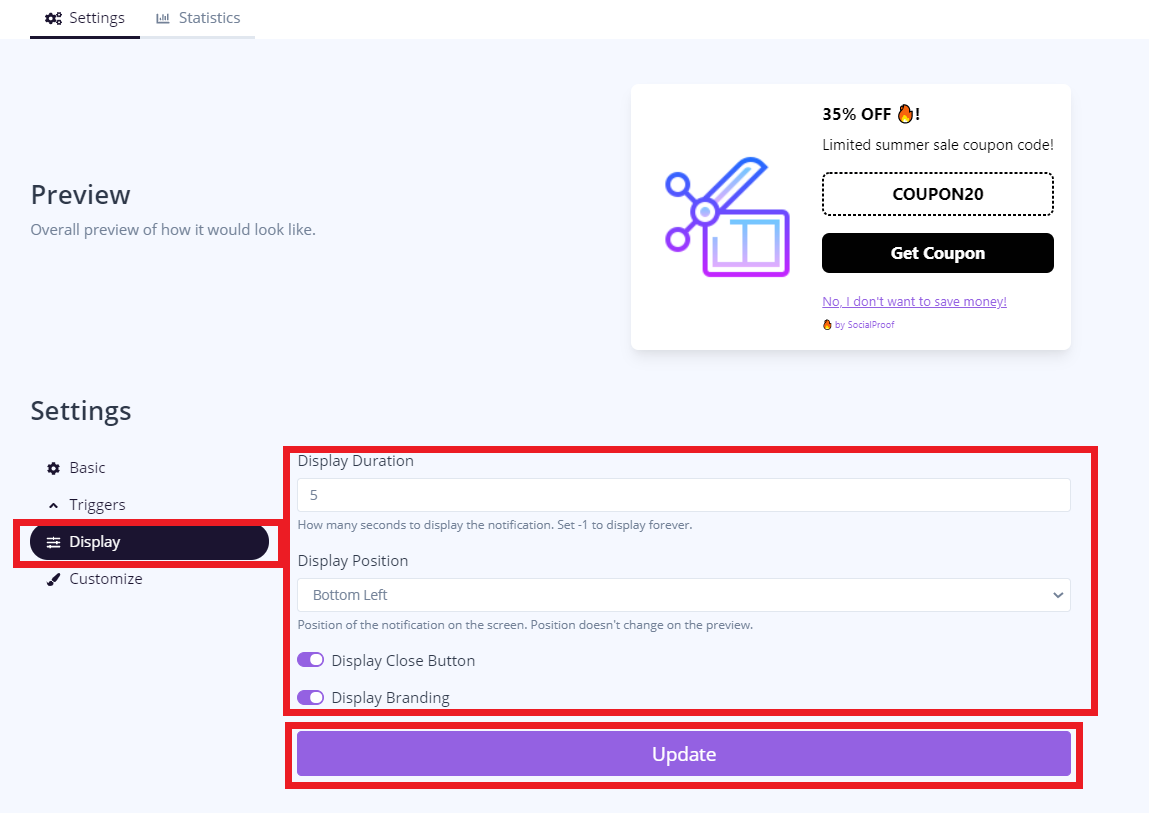
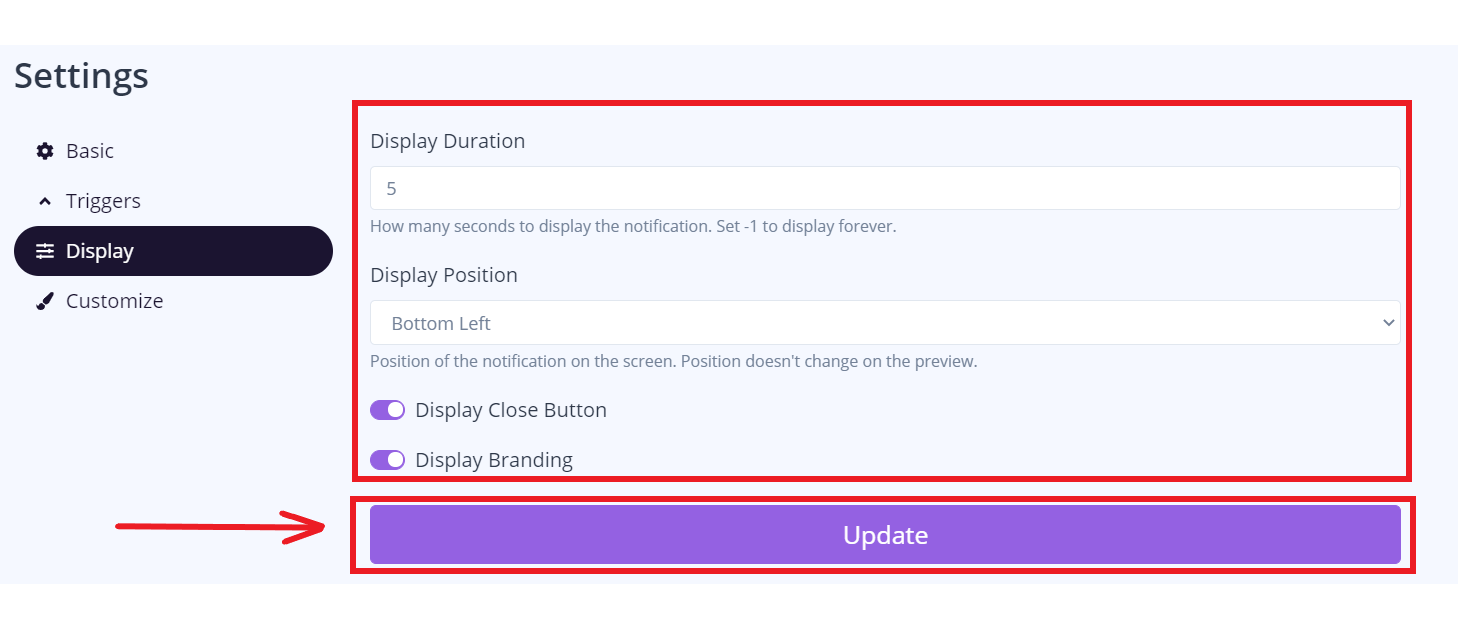
6. This section allows you to manage where and when is your notification will occur. once you're done click update.
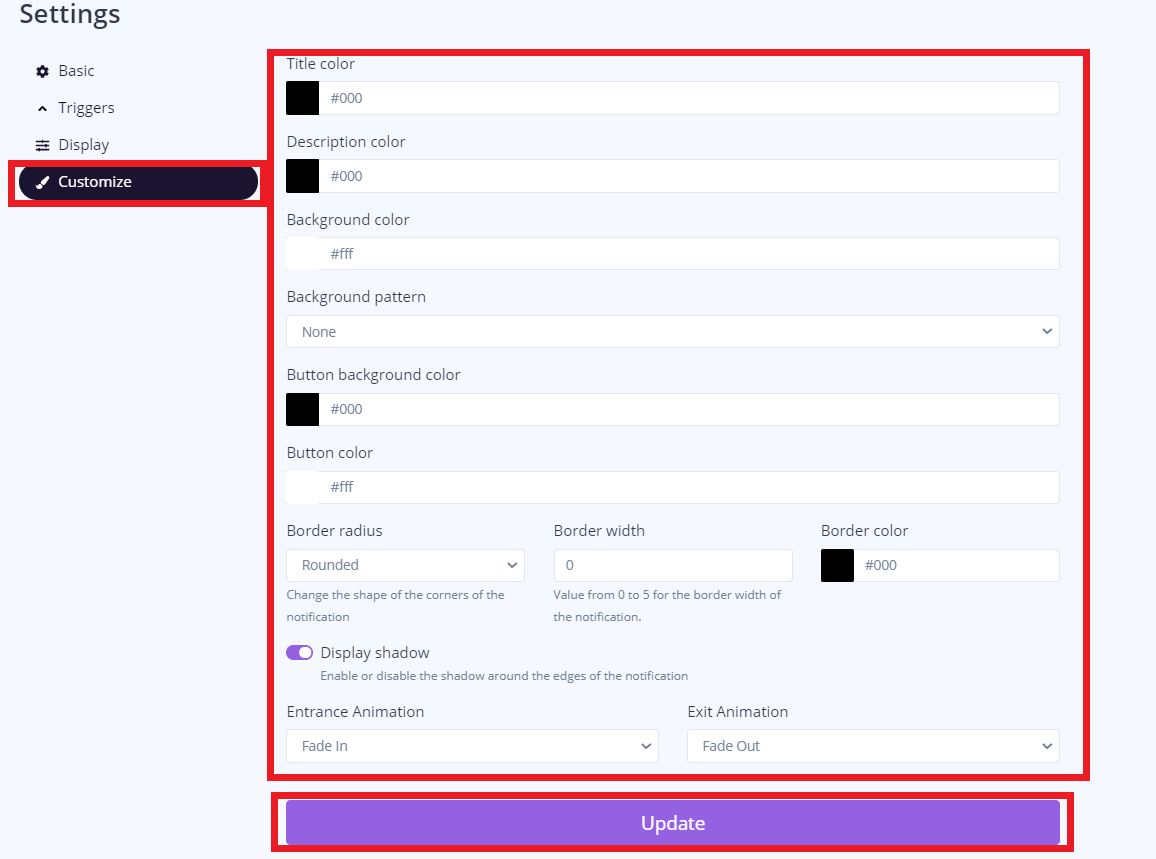
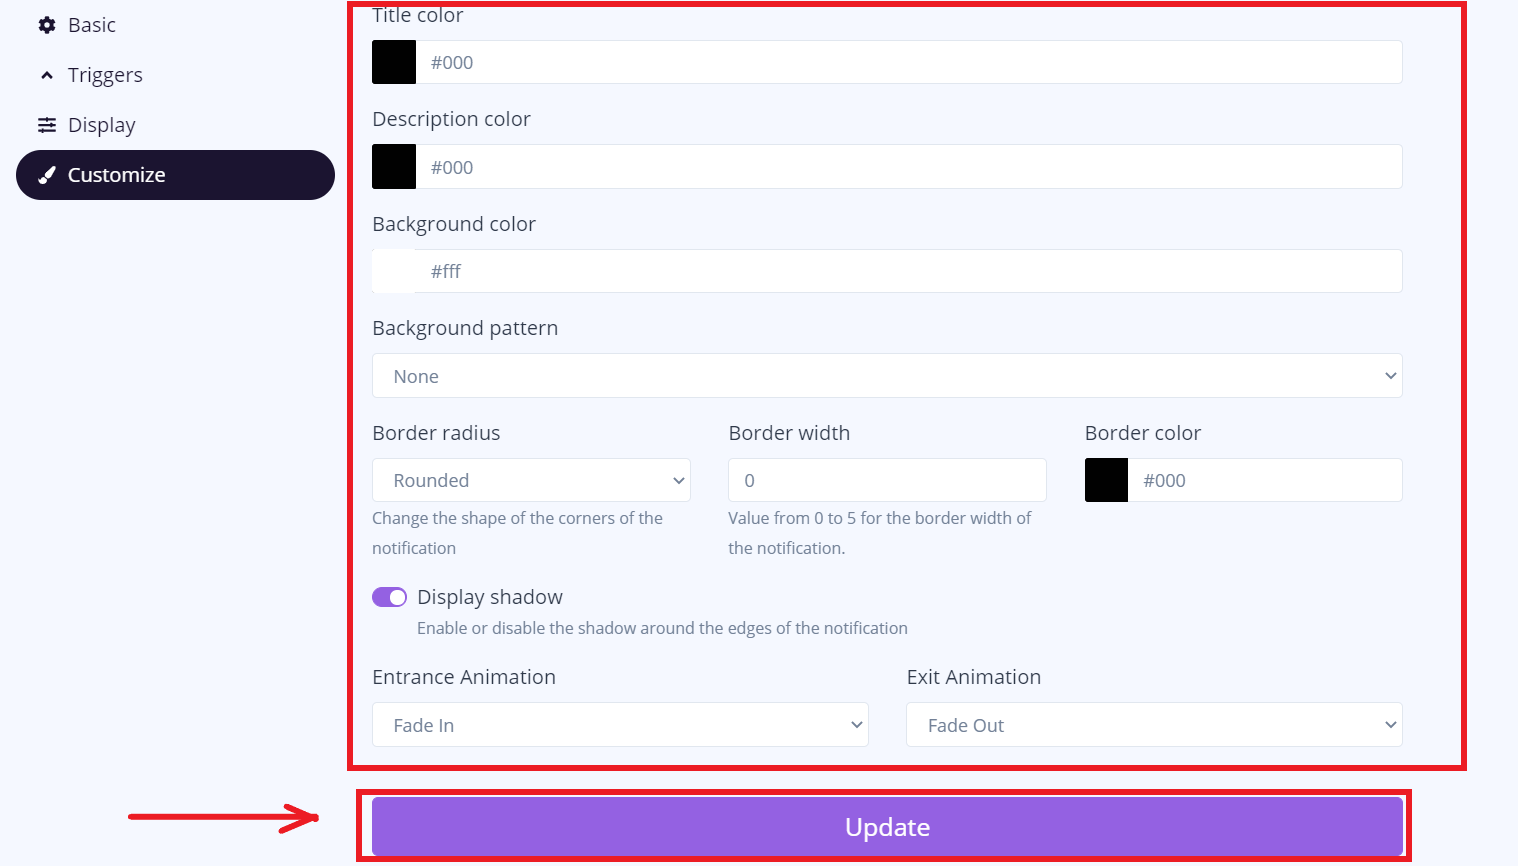
7. This section allows you to change the title color, description color, and background color to your notification. Click update once you're done.
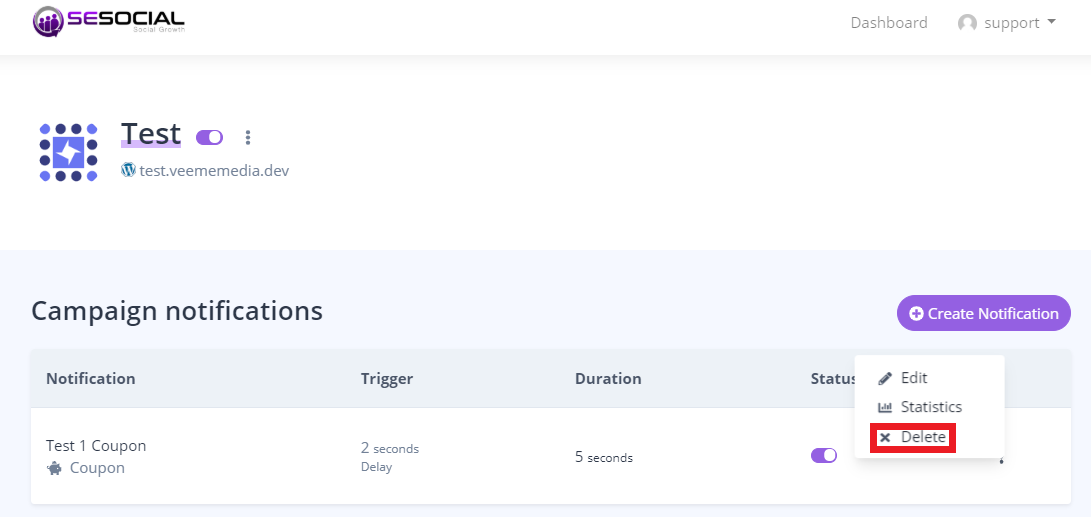
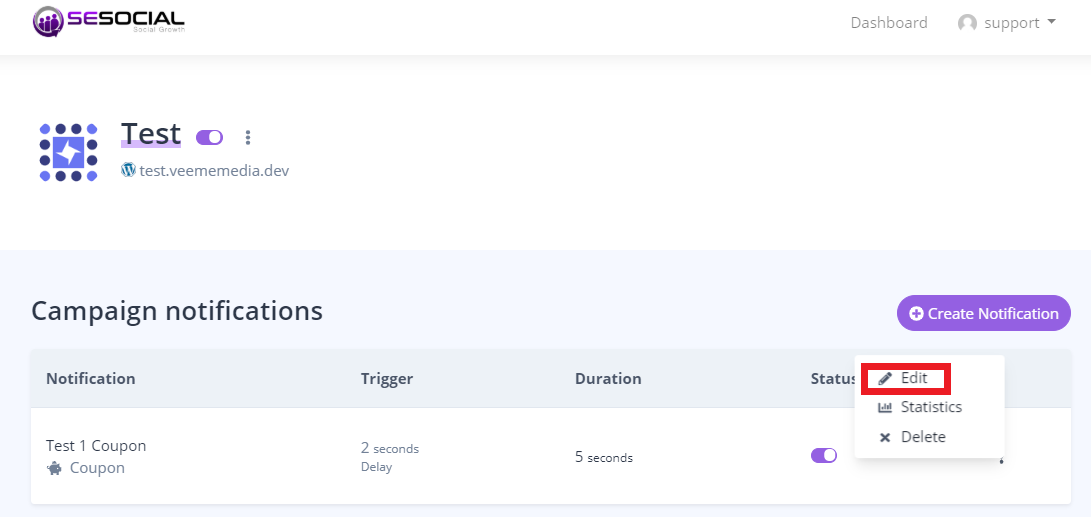
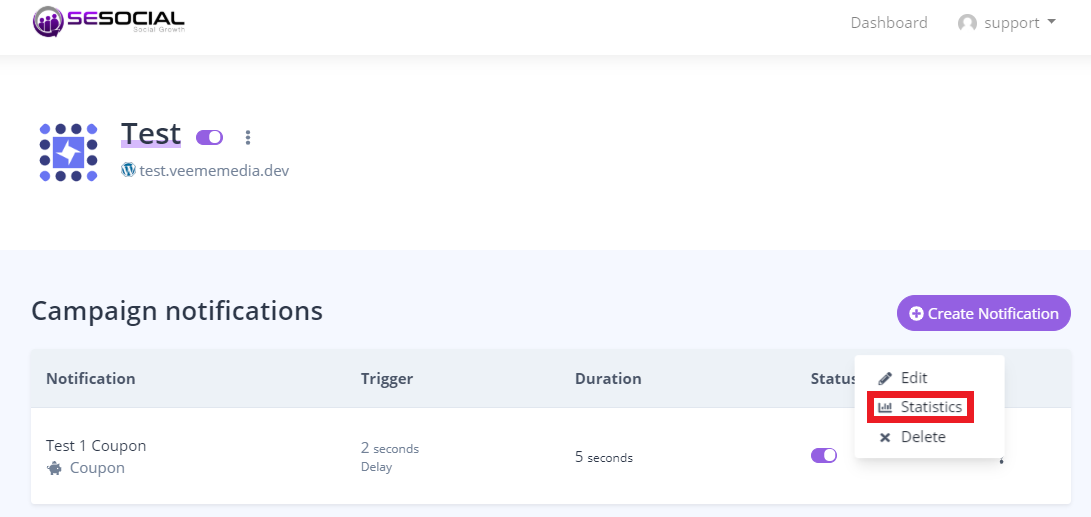
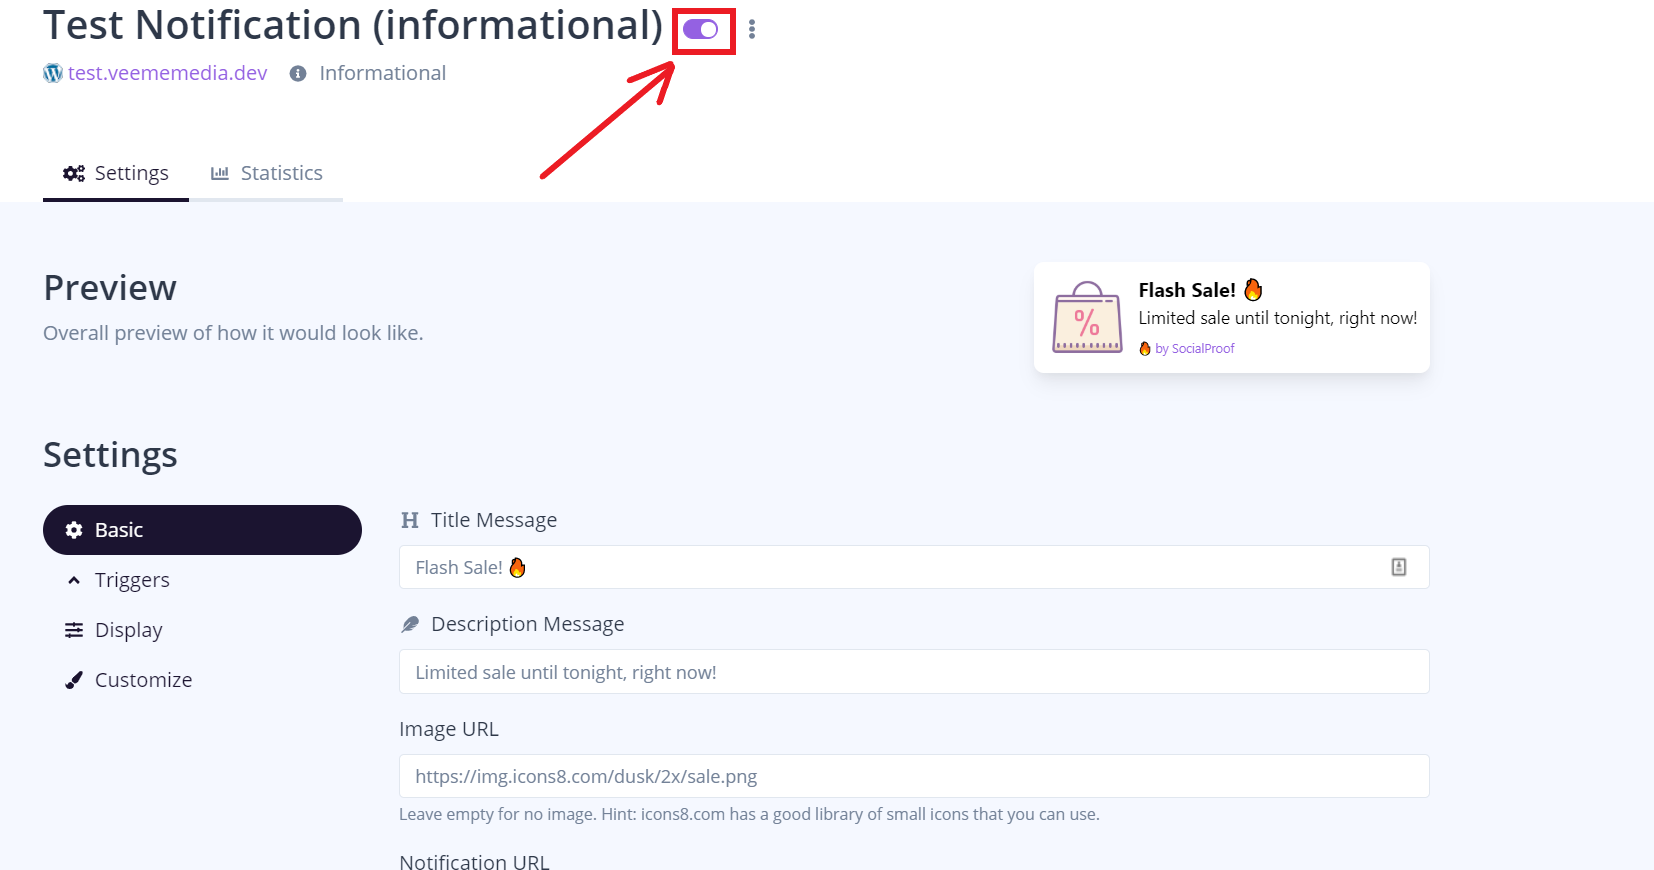
8. Click this button to change the activation status.
Select the "Coupon" button and enter the name of your coupon.
Then click "Create".
Click "Delete"
Select "Edit"
Click "Statistics"
Click "Display" then you can edit or add your "display duration" and "display position", then click "Update".
Click "Triggers" then you can edit the "Display trigger and Display Frequency" then click "Update".
Then click "Basic" then enter your URL in the "Button URL". Once done click "Update"
]]>
Click "Customize". In these settings, you can edit your "Title color", "Description color", "Background color".
once done click "Update"